Not Your Ordinary Wings, No Sir! These Wings Will Ruffle up Your Game Day Feathers!

 Entertaining Ideas And Tips  Comments Off on Not Your Ordinary Wings, No Sir! These Wings Will Ruffle up Your Game Day Feathers!
Jan 282015


Not Your Ordinary Wings, No Sir!


These Wings Will Ruffle up Your


Game Day Feathers!


Just 3 days away and you are about to have a house full of hungry football fans cheering on their favorite team, and hoping to score a TOUCHDOWN!
You can score a personal TOUCHDOWN of your own, with a menu that totally says…

”This girl knows her crowd!”
Who doesn’t love WINGS and FOOTBALL!! That’s right…WINGS!!

I have compiled a pretty satisfying assortment of sticky, sweet, spicy and finger-licking good choices along with TWO tasty side dishes that I believe will have your guests yelling TOUCHDOWN on both counts!

Let’s get that party started!!

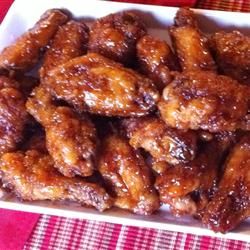
Root Beer Honey BBQ Wings

CQ- Root Beer wings

Any excuse for Chicken Wings is a good one, and these are a must-have for your Game Day Menu!

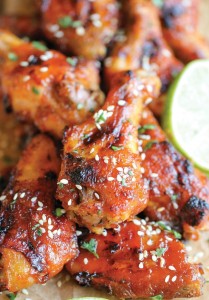
Baked Honey Sriracha Wings

CQ-honey Siracha wings

These wings are perfect game day food with an amazing combination of sweetness and spiciness in every bite, and they’re baked to absolute crisp perfection!

How about something mouthwatering and savory! These delicious wings are for those who don’t care to be sticky….

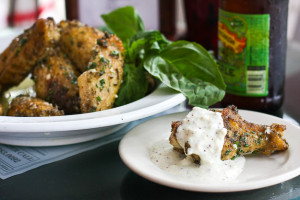
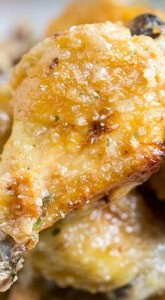
Baked Parmesan Garlic Chicken Wings

CQ- baked-parmesan-garlic-wings

Click here to try this amazing flavor explosion!  

The star of most Super Bowl parties is the chicken wing, crispy and covered in a delicious sauce. If you are going to make wings for your Super Bowl party …they may as well be amazing! Let’s keep going, I have a few more delicious options ahead….

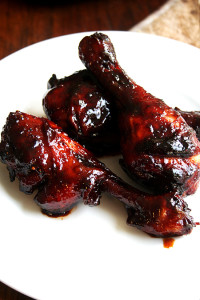
Honey-Soy Chicken Wings

CQ-honey-soy wings

This is that “Wow” kinda wing…for those who crave sweet and salty…

I am betting the kids will really dig this one…Yes, it tastes just like the chips! Grab a plate!

Salt and Vinegar Chicken Wings

CQ-Salt and Vinegar Wings

No Sauce needed…plenty of flavor and tang to tempt those taste buds into another cold one!

   If you enjoy Asian style food then you will LOVE this. These wings have an Asian flair and are sticky, saucy, sweet, and tangy.       

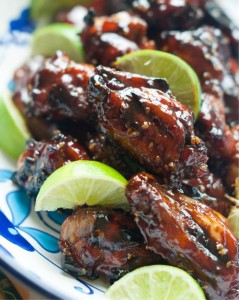
Honey Lime Sesame Chicken Wings

CQ-Paleo-Honey-Lime-Sesame-Chicken-Wings

These are so easy to whip up, SO flavorful, and are fall off the bone tender.

Now that we have you all set with the wings…how about a few tasty sides to go with it. 

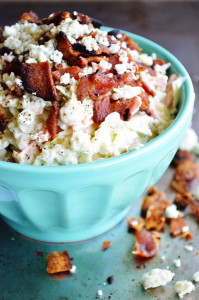
Blue Cheese Coleslaw (with bacon)

CQ- Blue cheese bacon slaw

This creamy and cheesy coleslaw with bacon is the perfect side dish for any meal!

And last but not least by any means…a little something that can be enjoyed as a side to all those delicious wings, or is just perfect as a stand alone type of dish for those who prefer just the veggies…

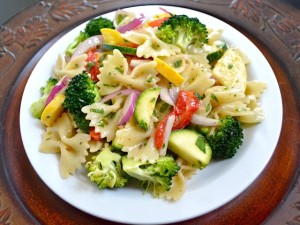
Vegetable Pasta Salad

CQ-Veggie Pasta Salad

This dish can hold it’s own..even in this crowd! 

The best thing about this MENU is that , all of these delicious recipes can be enjoyed the next day as well! Don’t forget to put out PLENTY OF NAPKINS!!  

One final tip from me on game day ….


Don’t Get a Game Day Penalty! ( Follow these tips to keep everyone safe)


Baking Your Wings

To start baking wings, preheat your oven to 400 °F. Meanwhile, place your wings in a rimmed baking sheet. To ensure maximum crispiness, do not crowd the wings and place them in a single layer.

After 30 minutes of cooking take out the pan, flip the wings and continue baking for another 15 to 20 minutes. This will ensure both sides of the wings are crispy. Read on to learn how to properly take the internal temperature of a sample of your wings before your serve them. Taking the internal temperature is the only way to know if the wings are fully cooked and ready to eat.

Frying Your Wings

If you want to fry your wings, and are using a skillet, fill oil no more than 2 inches from the top of the skillet to allow space for the oil to rise. It is best if you have a candy or deep frying thermometer to ensure the oil reaches and stays at 375 °F. When your oil reaches that temperature you’re ready to cook.

Before frying, remove the chicken wings from the refrigerator and pat dry the wings to prevent oil splatter.

Make sure not to overcrowd the chicken wings as you place them in the fryer. If crowded, wings can turn our undercooked and increase the chances of giving your guests food poisoning.

While it is important to test the internal temperature of the chicken wings to ensure they are cooked, DO NOT test the temperature while the wings are submerged in oil. This will lead to an inaccurate temperature reading. To take the temperature of your wings, place them on a clean plate covered with paper towels.

Taking the Temperature

Whether you are frying or baking your wings, it’s important to take the internal temperature of multiple wings with a clean food thermometer. For an accurate reading, insert the meat thermometer into the thickest area of the wing being careful to avoid the bone.

If the wings are below the minimum safe internal temperature of 165 °F, return to the oven or submerge again in the hot oil.

After Cooking

Coat your delicious wings with a sauce of your choosing and remember to refrigerate leftovers within 2 hours. Cooked food left out longer than 2 hours can rapidly grow bacteria making it unsafe to eat.

 Touchdown!!

Get your party hats out and your zany glasses on—it’s time to count down to 2015!!

 Appetizers, Easy Recipes, Entertaining Ideas And Tips, Holiday/Entertaining  Comments Off on Get your party hats out and your zany glasses on—it’s time to count down to 2015!!
Dec 302014


 The cocktails are chilled, you bought a great outfit, Why cook?  Have a Happy New Year Appetizer Party!


Get your party hats out and your zany glasses on—it’s time to count down to 2015!!

Appetizers, hors d’oeuvres, little plates, whatever you’d like to call them are the standard party fare for the last night of 2015. Nobody is going to blame you if your New Year’s Eve party spread includes a bowl of mixed nuts, some grapes and a wedge or two of cheese. After all, most people enjoy them and are willing to nibble mindlessly on them. As long as you remember the Champagne!


But it is easier than you think to elevate your feast and those tired party snack clichés with a few more creative offerings. You can try treats that require some time to prepare, however, if you don’t have the time or energy, other party snacks can be assembled in less than 10 minutes. The only truly important rule is to make sure everything is neat, easy to eat and of course beautiful. After all we do eat with our eyes too…so make it pretty!

Here are a few tasty nibbles to get you started!


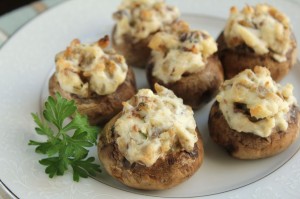
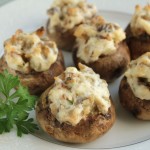
Sausage Stuffed Mushrooms


b1


Click here to try these delicious Stuffed Sausage Mushrooms


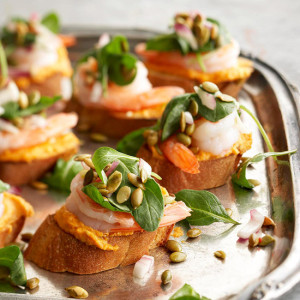
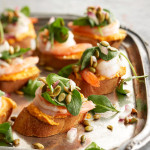
Pumpkin-Shrimp Bruschetta

b2

How can you resist this pretty appetizer…click here

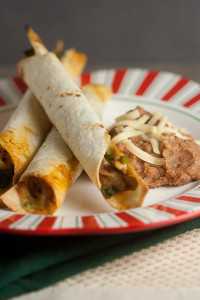
Baked Chicken and Spinach Flautas

b3

These will be gone in a flash…click here for the recipe

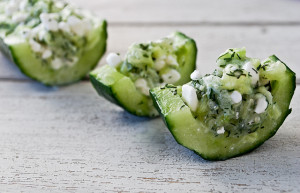
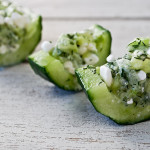
Cucumber & Feta Bites

b4

Zesty yet refreshing…click here for the recipe

No matter if your New Year’s Eve plans include an all-night bash or a casual evening in front of the television, ring in 2015 with eats and drinks worthy of the celebration!


Happy New Year!


Dec 302014
 
Cucumber & Feta Bites
Recipe Type: Appetizer
[url href=”http://cookingqueen.com/wp-content/uploads/2014/12/b4-300×193.jpg”][img src=”http://cookingqueen.com/wp-content/uploads/2014/12/b4-300×193.jpg” width=”300″ height=”193″ class=”alignnone size-medium” title=”b4″][/url]
Ingredients
  • 2 cucumbers (about 1 pound each)
  • 2 ounces crumbled feta cheese
  • 1/4 teaspoon salt
  • 1 teaspoon fresh parsley or dill, chopped
  • Freshly ground black pepper, to taste
Instructions
  1. Cut the cumbers lengthwise, and remove the seeds, then cut a small strip off the bottom of one side so that the cucumber half will set level, without falling over.
  2. Use the other half of the cucumber and dice into 1/4 inch pieces.
  3. Combine the diced cucumbers with feta cheese, dill, salt and pepper.
  4. Divide the mixture between the 2 cucumber “boats”, then slice into 1 1/2 inch pieces.


Dec 302014
 
Pumpkin-Shrimp Bruschetta
Recipe Type: Appetizer
[url href=”http://cookingqueen.com/wp-content/uploads/2014/12/b2-300×300.jpg”][img src=”http://cookingqueen.com/wp-content/uploads/2014/12/b2-300×300.jpg” width=”300″ height=”300″ class=”alignnone size-medium” title=”b2″][/url]
Ingredients
  • 20 fresh or frozen jumbo shrimp in shells
  • 1 cup canned pumpkin
  • 1/2 cup crumbled goat cheese, at room temperature (2 ounces)
  • 1 tablespoon lemon juice
  • 1 tablespoon honey
  • 1 cup arugula
  • 1/2 cup finely chopped red onion
  • 1/2 cup toasted pumpkin seeds*
  • 1/4 cup bottled Italian vinaigrette salad dressing
  • 20 3/4-inch-thick slices baguette-style French bread
  • 2 tablespoons olive oil
  • 2 ounces Parmesan cheese, shaved (optional)
Instructions
  1. Peel and devein shrimp, leaving tails intact.
  2. Rinse shrimp.
  3. In a large skillet, cook shrimp in a large amount of boiling water for 2 to 3 minutes or until shrimp are opaque.
  4. Drain well.
  5. Preheat broiler.
  6. In a medium bowl, whisk together pumpkin, goat cheese, lemon juice, and honey; set aside.
  7. In a large bowl, combine shrimp, arugula, onion, pumpkin seeds, and salad dressing; set aside.
  8. Brush both sides of baguette slices lightly with olive oil.
  9. Arrange on a large baking sheet.
  10. Broil 3 to 4 inches from the heat about 2 minutes or until toasted, turning bread over once.
  11. Spread pumpkin mixture on one side of toasted baguette slices.
  12. Top each with a shrimp and some of the arugula mixture.
  13. If desired, top each with shaved Parmesan cheese.
  14. Makes 20 appetizers


Dec 302014
 
Sausage Stuffed Mushrooms
Recipe Type: Appetizer
[url href=”http://cookingqueen.com/wp-content/uploads/2014/12/b1-300×199.jpg”][img src=”http://cookingqueen.com/wp-content/uploads/2014/12/b1-300×199.jpg” width=”300″ height=”199″ class=”alignnone size-medium” title=”b1″][/url]
Ingredients
  • 2 (12 ounce) packages white button mushrooms, cap size doesn’t really matter
  • 1 (8 ounce) package cream cheese
  • 1 (8 ounce) package sausage
  • 1/4 cup butter (melted, quite optional!)
Instructions
  1. Preheat oven to 350 Fahrenheit.
  2. Separate caps and stems while cleaning the mushrooms.
  3. If cleaning with water, let them drain for a bit.
  4. Start cooking the sausage in frying pan, at a medium to medium/high temperature.
  5. While the sausage is cooking, put the cream cheese into a mixing bowl so it can soften and mince the stem pieces.
  6. Spice the sausage to taste. Garlic is a good addition.
  7. Just before the sausage is done, add the stem pieces and finish cooking.
  8. Drain off the excess grease and add the sausage/stem mixture into the cream cheese.
  9. Mix together well using a wooden spoon or your hands. Be careful, as it will be rather hot.
  10. Set the caps into a 13×9 pan (or larger) with sides.
  11. Optional! Melt enough butter to just put a little in the bottom of each cap or just brush some over the top of each after they’re filled. You can put any extra butter in the bottom of the pan.
  12. Fill the caps with the cream cheese/sausage/stem mix.
  13. Add a small amount of water to the bottom of the pan, just enough to cover the bottom.
  14. Bake for 30 to 45 minutes, or until the tops are crusty and the mushrooms have turned dark.
  15. Scoop them out of the pan with a slotted spoon and arrange them on a plate.
  16. Serve warm. They reheat well, so you can make them ahead of time.


Dec 082014
 
Strawberry Sponge Cake
[url href=”http://cookingqueen.com/wp-content/uploads/2014/12/a-strawberry-sponge-2-200×300.jpg”][img src=”http://cookingqueen.com/wp-content/uploads/2014/12/a-strawberry-sponge-2-200×300.jpg” width=”200″ height=”300″ class=”alignnone size-medium” title=”a strawberry sponge 2″][/url]
Ingredients
  • 6 oz butter, soft
  • 6 oz white sugar
  • 3 large eggs
  • 6 oz self-rising flour
  • 1 lemon, zested
  • 1 cup whipping cream
  • 1 tsp vanilla bean paste, or vanilla extract
  • 1 tbsp icing sugar and extra for sifting
  • 3/4 lb strawberries
  • 4 tbsp good quality strawberry or raspberry jam
Instructions
  1. Pre-heat the oven to 350°F.
  2. Butter and line two 8 or 9-inch cake tins with parchment paper.
  3. Using a standing mixer, beat the butter, sugar and lemon zest until it becomes pale and fluffy. Add the eggs one at a time, beating well.
  4. Then fold in the flour, one spoonful at a time, and blend until well combined.
  5. Divide the mixture evenly between the 2 cake tins and level off with a knife.
  6. Bake for 20 minutes until the sponge cakes are well risen, golden brown and firm to the touch. Run a rounded butter knife around the inside edge of the cake tin and carefully turn the cake out onto a cooling rack.
  7. Meanwhile, hull the strawberries and slice them in half.
  8. Whip the cream, icing sugar and vanilla until it becomes quite stiff.
  9. When the cakes are cool, spread the jam on one of the sponge cakes and spread half of the whipped cream on top.
  10. Place half of the strawberries on top of the cream.
  11. Place the other sponge cake on top and spread with the remaining whipped cream.
  12. Arrange the remaining strawberries in a spiral round the top of the cake.


Dec 082014
 
Baklava (a Greek dessert pastry)
Cuisine: Greek
[url href=”http://cookingqueen.com/wp-content/uploads/2014/12/a-baklava-300×225.jpg”][img src=”http://cookingqueen.com/wp-content/uploads/2014/12/a-baklava-300×225.jpg” width=”300″ height=”225″ class=”alignnone size-medium” title=”Food Stylist: Jamie Kimm”][/url]
Ingredients
  • For the Baklava:
  • 1 pound pistachios and/or walnuts, coarsely ground, plus more for garnish
  • 1/2 teaspoon ground cinnamon, or to taste
  • 1 cup ground zwieback crackers or breadcrumbs
  • 4 sticks unsalted butter, melted
  • 16 sheets phyllo dough (thawed, if frozen), cut in half
  • For the Syrup:
  • 3 cups sugar
  • 1 6 -to-8-ounce jar honey
  • 1 to 2 tablespoons fresh lemon juice
Instructions
  1. Position a rack in the lower third of the oven; preheat to 350 degrees F.
  2. Combine the nuts, cinnamon and ground crackers in a bowl.
  3. Brush a 9-by-13-inch baking dish with some of the butter.
  4. Layer 10 pieces of phyllo in the dish, brushing each piece with butter before adding the next (keep the remaining dough covered with a damp towel).
  5. Sprinkle a quarter of the nut mixture over the dough.
  6. Layer 4 pieces of phyllo on top, brushing each with butter before adding the next; sprinkle with another quarter of the nut mixture.
  7. Add 4 more phyllo pieces on top, brushing each with butter, then add another quarter of the nut mixture, 4 more pieces of phyllo with butter, and the remaining nuts.
  8. Layer the remaining 10 pieces of phyllo on top of the nuts, brushing each with butter; brush the top piece with extra butter.
  9. Cut into the baklava to make strips, about 1 1/2 inches wide.
  10. Then make diagonal slices, about 1 1/2 inches apart, to create a diamond pattern.
  11. Bake until golden, about 1 hour.
  12. Meanwhile, make the syrup: Bring the sugar, honey and 1 1/2 cups water to a boil in a saucepan over medium heat and cook, 10 to 15 minutes.
  13. Add the lemon juice and boil 2 more minutes, then let cool slightly.
  14. Pour the syrup over the warm baklava; let soak, uncovered, at least 6 hours or overnight. Garnish with nuts.


Dec 082014
 
Lussekatter ( St. Lucia Buns)
Cuisine: Swedish
Cook time:
Total time:
[url href=”http://cookingqueen.com/wp-content/uploads/2014/12/a-lussekatter-2-207×300.jpg”][img src=”http://cookingqueen.com/wp-content/uploads/2014/12/a-lussekatter-2-207×300.jpg” width=”207″ height=”300″ class=”alignnone size-medium” title=”a lussekatter 2″][/url]
Ingredients
  • Ingredients:
  • 8 tablespoons (1 stick) unsalted butter
  • 1-1/3 cups milk
  • 1 teaspoon saffron threads, chopped fine and soaked in a few drops of water
  • 1 tablespoon active dry yeast
  • 2/3 cup sugar
  • 1/2 teaspoon salt
  • 2 eggs, divided use
  • 4 cups unbleached flour + flour for kneading
  • Raisins for garnish
Instructions
  1. Melt butter in a small saucepan set over medium heat.
  2. Add milk and saffron and heat until just until warm.
  3. Pour into bowl of an electric stand mixer.
  4. Sprinkle yeast over milk and let it sit for 5 minutes.
  5. Add sugar, salt, 1 egg and 2 cups flour.
  6. Beat with paddle attachment until smooth and well combine, about 2 minutes on medium speed.
  7. Add final 2 cups of flour.
  8. Using dough hook, beat until mixture is smooth and begins to climb beater.
  9. Transfer dough to a lightly floured surface and knead until perfectly smooth.
  10. This dough has a wonderful velvety texture to it.
  11. Place in a greased bowl, turn once to coat all surfaces, and let rise, covered, in a warm place until doubled in bulk, about 1 hour.
  12. Line a baking sheet with parchment paper.
  13. Preheat oven to 400 degrees F. Punch dough down, roll into a cylinder 36 inches long.
  14. Cut 18 2-inch pieces from cylinder.
  15. Roll each piece into a 10-inch rope.
  16. Form each piece into an S, spiraling ends to form a figure eight.
  17. Transfer pieces to to prepared baking sheet.
  18. Let rise, covered, until doubled in size, about 45 minutes.
  19. Brush buns with reserved egg.
  20. Tuck raisins into spirals at each end of figure eight.
  21. Bake for 15 minutes, or until golden brown. Yield: 18 buns.


Dec 082014
 
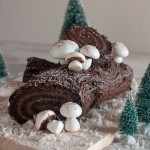
Buche de Noel (Yule Log)
Cuisine: French
[url href=”http://cookingqueen.com/wp-content/uploads/2014/12/a-buche-de-noel-199×300.jpg”][img src=”http://cookingqueen.com/wp-content/uploads/2014/12/a-buche-de-noel-199×300.jpg” width=”199″ height=”300″ class=”alignnone size-medium” title=”a buche de noel”][/url]
Ingredients
  • For the Cake:
  • 4 large eggs, separated and at room temperature
  • 3/4 cup sugar
  • 3/4 cup cake flour, sifted
  • 2 once butter, melted and cooled slightly
  • cocoa powder
Instructions
  1. Preheat the oven 350 F.
  2. Grease a jelly roll pan (17 by 12 inches) and line the bottom with parchment paper.
  3. Grease the parchment paper and flour the bottom and sides of the pan, knocking out the excess.
  4. We first need to make a meringue. In the bowl of an electric mixer fitted with whip attachment, beat the egg whites on low, gradually add the sugar and raise the speed to high, beat for about 5 minutes or until stiff peaks form.
  5. In a separate bowl, beat the egg yolks and using a rubber spatula, carefully fold them into the meringue.
  6. Fold the cake flour into the meringue and last fold the cooled melted butter.
  7. Carefully pour the batter into the prepared pan, smoothing it out into an even layer.
  8. Bake the cake for 5 minutes, rotate the pan and continue to bake for another 7 minutes or until the center springs back when lightly touched.
  9. While the cake is baking, place a clean kitchen towel on a work surface.
  10. Place coco power in a sieve and generously dust the kitchen towel evenly.
  11. When the cake is done, immediately flip it into the prepare kitchen towel.
  12. Remove the pan and gently peel off the parchment paper.
  13. Carefully start rolling the cake from the long end into a tight spiral.
  14. Keep the cake rolled until it’s completely cooled and really to be filled.


Buche de Noel (Yule Log) Buttercream
Cuisine: French
[url href=”http://cookingqueen.com/wp-content/uploads/2014/12/a-buche-de-noel-199×300.jpg”][img src=”http://cookingqueen.com/wp-content/uploads/2014/12/a-buche-de-noel-199×300.jpg” width=”199″ height=”300″ class=”alignnone size-medium” title=”a buche de noel”][/url]
Ingredients
  • Dulce de leche Buttercream: ( Buche de Noel)
  • 1 sticks of butter, softened
  • 8oz cream cheese, softened
  • 1/2 cup dulce de leche
  • 1 1/2 cups confectioners’ sugar
  • 1 teaspoon vanilla extract
  • 1 pinch of salt
Instructions
  1. In a mixer fitted with a paddle attachment, whip the butter and cream cheese together until creamed.
  2. Add the dulce the leche and mix until smooth.
  3. Gradually add powdered sugar to the mixture.
  4. Scrape down the sides of the bowl.
  5. Add the vanilla and salt and mix for 3 minutes more.
  6. To assemble:
  7. Gently unfold the cake and using an offset spatula, lightly coat the surface of the cake with a thin layer of butter cream.
  8. With the help of the kitchen towel, carefully re-roll the cake into a tight roll.
  9. Transfer the cake to a serving platter before continue with the decoration.
  10. Using a serrated knife, cut 1 inch off one of the ends of the log and place the end piece cut side up on top of the log (“glue” it to the log with some butter cream) to resemble cut brunch.
  11. Using the offset spatula, cover the entire log including the ends with butter cream.
  12. With the help of a fork, score the log in long even lines to resemble tree bark.
  13. Decorate the cake with mushrooms meringues (this is the fun part so enjoy it!) and last but not least, let it snow!! Dust the cake with confectioners’ sugar!!


Buche de Noel (Yule Log) Mushrooms
Cuisine: French
[url href=”http://cookingqueen.com/wp-content/uploads/2014/12/a-buche-de-noel-199×300.jpg”][img src=”http://cookingqueen.com/wp-content/uploads/2014/12/a-buche-de-noel-199×300.jpg” width=”199″ height=”300″ class=”alignnone size-medium” title=”a buche de noel”][/url]
Ingredients
  • For the mushroom meringue:
  • 3 large egg whites
  • 1/2 tsp lemon juice
  • 9 tbsp granulated sugar
  • 1/2 tsp vanilla
  • chocolate frosting
Instructions
  1. Preheat the oven 200 F.
  2. Line a large baking sheet with parchment paper, set aside.
  3. Beat the egg whites with lemon juice until stiff peaks form.
  4. Add the sugar one tablespoon at the time mixing well after each addition.
  5. Mix until whites are stiff and glossy.
  6. Beat in vanilla.
  7. Transfer mixture to large pastry bag fitted with 1/2-inch plain pastry tip.
  8. For the mushroom caps: Pipe domes, 1 to 2 inches in diameter, onto prepared baking sheets, and flatten the tips with your fingers.
  9. Pipe stems onto baking sheets.
  10. Bake for 1 hour in the preheated oven or until dry.
  11. To assemble, spread bottoms of caps with a thin layer of chocolate frosting, carefully insert stem.
  12. With your fingers, rub some chocolate frosting on top of each mushroom cap.

Coquito – Puerto Rican Egg Nog

 Beverages, Christmas, Entertaining, Holiday/Entertaining  Comments Off on Coquito – Puerto Rican Egg Nog
Nov 282014
 
Coquito – Puerto Rican Egg Nog
Prep time:
Cook time:
Total time:
Serves: 4
[url href=”http://cookingqueen.com/wp-content/uploads/2014/11/a-coquito-205×300.jpg”][img src=”http://cookingqueen.com/wp-content/uploads/2014/11/a-coquito-205×300.jpg” width=”205″ height=”300″ class=”alignnone size-medium” title=”a-coquito”][/url]
Ingredients
  • 1 – 12 oz can Evaporated Milk
  • 1- 14 oz can Condensed Milk
  • 1- can Coco Lopez brand Cream of Coconut
  • 6 oz Bacardi or your favorite White rum
  • 1/4 tsp Cinnamon
  • 1/8 tsp Nutmeg
  • 1 tsp Coconut or Vanilla Extract
Instructions
  1. Mix or blend all ingredients together
  2. Pour into a decorative bottle or re-use the rum bottle
  3. Refrigerate for minimum of 1 hour , before serving
  4. Serve Ice cold with a stick of cinnamon as decoration