Jean Lanoue

Dec 302014
 
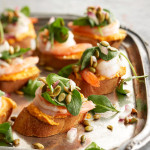
Pumpkin-Shrimp Bruschetta
Recipe Type: Appetizer
[url href=”http://cookingqueen.com/wp-content/uploads/2014/12/b2-300×300.jpg”][img src=”http://cookingqueen.com/wp-content/uploads/2014/12/b2-300×300.jpg” width=”300″ height=”300″ class=”alignnone size-medium” title=”b2″][/url]
Ingredients
  • 20 fresh or frozen jumbo shrimp in shells
  • 1 cup canned pumpkin
  • 1/2 cup crumbled goat cheese, at room temperature (2 ounces)
  • 1 tablespoon lemon juice
  • 1 tablespoon honey
  • 1 cup arugula
  • 1/2 cup finely chopped red onion
  • 1/2 cup toasted pumpkin seeds*
  • 1/4 cup bottled Italian vinaigrette salad dressing
  • 20 3/4-inch-thick slices baguette-style French bread
  • 2 tablespoons olive oil
  • 2 ounces Parmesan cheese, shaved (optional)
Instructions
  1. Peel and devein shrimp, leaving tails intact.
  2. Rinse shrimp.
  3. In a large skillet, cook shrimp in a large amount of boiling water for 2 to 3 minutes or until shrimp are opaque.
  4. Drain well.
  5. Preheat broiler.
  6. In a medium bowl, whisk together pumpkin, goat cheese, lemon juice, and honey; set aside.
  7. In a large bowl, combine shrimp, arugula, onion, pumpkin seeds, and salad dressing; set aside.
  8. Brush both sides of baguette slices lightly with olive oil.
  9. Arrange on a large baking sheet.
  10. Broil 3 to 4 inches from the heat about 2 minutes or until toasted, turning bread over once.
  11. Spread pumpkin mixture on one side of toasted baguette slices.
  12. Top each with a shrimp and some of the arugula mixture.
  13. If desired, top each with shaved Parmesan cheese.
  14. Makes 20 appetizers


Dec 302014
 
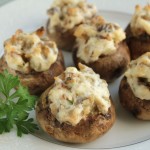
Sausage Stuffed Mushrooms
Recipe Type: Appetizer
[url href=”http://cookingqueen.com/wp-content/uploads/2014/12/b1-300×199.jpg”][img src=”http://cookingqueen.com/wp-content/uploads/2014/12/b1-300×199.jpg” width=”300″ height=”199″ class=”alignnone size-medium” title=”b1″][/url]
Ingredients
  • 2 (12 ounce) packages white button mushrooms, cap size doesn’t really matter
  • 1 (8 ounce) package cream cheese
  • 1 (8 ounce) package sausage
  • 1/4 cup butter (melted, quite optional!)
Instructions
  1. Preheat oven to 350 Fahrenheit.
  2. Separate caps and stems while cleaning the mushrooms.
  3. If cleaning with water, let them drain for a bit.
  4. Start cooking the sausage in frying pan, at a medium to medium/high temperature.
  5. While the sausage is cooking, put the cream cheese into a mixing bowl so it can soften and mince the stem pieces.
  6. Spice the sausage to taste. Garlic is a good addition.
  7. Just before the sausage is done, add the stem pieces and finish cooking.
  8. Drain off the excess grease and add the sausage/stem mixture into the cream cheese.
  9. Mix together well using a wooden spoon or your hands. Be careful, as it will be rather hot.
  10. Set the caps into a 13×9 pan (or larger) with sides.
  11. Optional! Melt enough butter to just put a little in the bottom of each cap or just brush some over the top of each after they’re filled. You can put any extra butter in the bottom of the pan.
  12. Fill the caps with the cream cheese/sausage/stem mix.
  13. Add a small amount of water to the bottom of the pan, just enough to cover the bottom.
  14. Bake for 30 to 45 minutes, or until the tops are crusty and the mushrooms have turned dark.
  15. Scoop them out of the pan with a slotted spoon and arrange them on a plate.
  16. Serve warm. They reheat well, so you can make them ahead of time.


Chocolate Haystacks

 Cookies, Desserts  Comments Off on Chocolate Haystacks
Dec 222014
 
Chocolate Haystacks
Recipe Type: Dessert
[url href=”http://cookingqueen.com/wp-content/uploads/2014/12/01-300×267.jpg”][img src=”http://cookingqueen.com/wp-content/uploads/2014/12/01-300×267.jpg” width=”300″ height=”267″ class=”alignnone size-medium” title=”01″][/url]
Ingredients
  • 2 C of Sugar
  • 1/2 C of Cocoa
  • 1/2 C of Milk
  • 1/2 C of Butter
  • 3 1/2 C quick oatmeal
  • 1/2 tsp Vanilla
Instructions
  1. Bring two cups of sugar, 1/2 c of cocoa ,1/2 c of milk and 1/2 c of butter to a full boil. Remove from heat and add 3 1/2 cups of quick oatmeal and 1/2 tsp vanilla.
  2. Mix and drop spoonfuls on to wax paper. Let cool. Enjoy!


HO HO HO It’s a GLUTEN-FREE Holiday!

 Gluten- Free, Holiday/Entertaining  Comments Off on HO HO HO It’s a GLUTEN-FREE Holiday!
Dec 172014


HO HO HO It’s a Gluten-Free Holiday!

The holidays can be challenging for people living with a gluten-related disorder since food is such a major focus of the festivities. With some preparation, and a few good recipes, you can have your (gluten-free) cake and eat it too!

Most children with Autism benefit greatly from simple changes in their diet. Eliminating Gluten is one such change that can benefit them greatly.

My son Hunter, really loves his desserts!

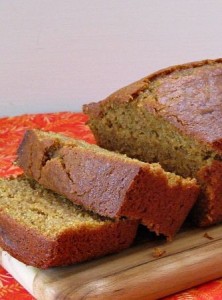
My Pumpkin Bread is one of his favorites.
Since he was small, I have made this simple treat for him.

It doesn’t need to be frosted or covered in sprinkles or powdered sugar…NO SIR…he just loves mommy’s Pumpkin Bread.

Hunter is in his teens now and he loves to help in the kitchen.

Pumpkin Bread is one of his favorite things to make.

I truly love spending this time with him baking together. I have an additional holiday gluten-free dessert recipe that is great for the home cook, hoping to impress their families this holiday season.

 It’s pretty cool and it’s attached as well. Here we go!

Click here for HUNTER’S Favorite Pumpkin Bread

GF Pumpkin Bread

Gluten-free desserts don’t always turn out fabulous and the last thing you want is to make a gluten-free delight for a holiday celebration that doesn’t live up to your expectations. (Be sure to try a few out beforehand). While many people may be watching their dessert intake on an average day and may not even partake in dessert at a dinner party, birthday party etc., almost no one refuses dessert at the holidays – making the enjoyment of their dessert that much more important. My recipe for Vanilla Christmas Trees are sure to be a hit with your friends.

Click here for my Vanilla Christmas Trees

GF Trees

Merry Christmas!!

Ashley.V

Vanilla Christmas Tree Meringues

 Desserts, Gluten- Free, Holiday/Entertaining  Comments Off on Vanilla Christmas Tree Meringues
Dec 172014
 
Vanilla Christmas Tree Meringues
Author: Ashley V.
Ingredients
  • 4 Egg Whites
  • 1/2 tsp of Cream of Tartar
  • 1 cup of plain white sugar
  • 1 tablespoon Butter Vanilla Emulsion flavoring
  • Christmas colored sprinkles
  • Golden tree topper sprinkles
  • Green food coloring.
  • Icing bag (or zip lock bag) and a star-shaped frosting tip. You can find these in the frosting section at your grocery store.
Instructions
  1. Preheat the oven to 225 degrees F.
  2. Prepare a baking sheet, covered in foil, and sprayed lightly with non-stick spray.
  3. Using an electric mixer, whip the egg whites for a few minutes on high speed until they are frothy.
  4. Add the sugar into the frothy egg mixture in small amounts.
  5. Continue to mix on high for 1 minute.
  6. Add in the cream of tartar.
  7. Add butter vanilla emulsion and green food coloring until desired shade is reached.
  8. Continue to whip the mixture on high for 4-5 minutes until stiff peaks form (meaning that the meringue holds a form when the mixer is turned off).
  9. Using an icing bag with a star shaped frosting tip, press the meringue mixture down onto the foil and gently swirl in a circular motion (like making soft serve ice cream).
  10. Add Christmas colored sprinkles and a golden sprinkle on top.
  11. Bake for 45 minutes or just before they begin to turn brown along the edges.
  12. Let them cool completely (or eat them when they are a tiny bit warm!).
  13. Store in an air tight container. Makes about 24 small trees.
  14. HOW FUN, right? You don’t have to be a professional to make adorable sweet treats. Just some simple ingredients, some simple directions, and you’re good to go!
  15. Merry Christmas!


Hunter’s Favorite Pumpkin Bread

 Breads, Easy Recipes, Gluten- Free  Comments Off on Hunter’s Favorite Pumpkin Bread
Dec 172014
 
Hunter’s Favorite Pumpkin Bread
Author: Ashley V.
Ingredients
  • 1 Package of Bob’s Red Mill Gluten Free baking Flour
  • 4 Egg Whites
  • 1 cup Gluten Free Coconut flour
  • 1 Can Libby’s Pumpkin
  • ½ Cup Coconut / Almond Milk
  • 2 TBS Maple syrup (all natural)
  • Nutmeg (to taste)
  • Cinnamon (to taste)
Instructions
  1. Mix all dry ingredients together, then add the wet.
  2. Pour into a greased (with coconut oil) bread pan.
  3. Bake @ 350 degrees for 45-50 mins.


Dec 082014
 

It’s hard to believe my favorite holiday is only a few weeks away – Christmas. This week I managed to finish all of my Christmas shopping for friends and family along with planning some unforgettable recipes to share with all of them.
December is a month of various Multicultural holidays. There are some wonderful holiday customs carried out all over the world, but also many delicious desserts, I would love to share a few with you.

Christmas in France
In French Happy/Merry Christmas is ‘Joyeux Noël’. In France, Father Christmas / Santa Claus / St. Nicholas is called Père Noël (Father Christmas).
The main Christmas meal, called Réveillon, is eaten on Christmas Eve/early Christmas morning after people have returned from the midnight Church Service. Dishes might include roast turkey with chestnuts or roast goose, oysters, foie gras, lobster, venison and cheeses. For dessert, a chocolate sponge cake log called a bûche de Noël (Yule Log) is normally eaten.
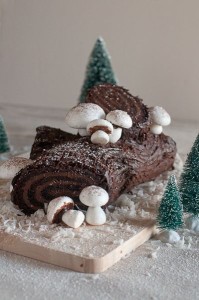
a buche de noel

To try this beautiful recipe for  Buche de Noel click here 

Christmas in Sweden
In Sweden, presents might be brought by Santa called ‘Jultomten’ or by gnomes/elves called ‘Nissar’ or ‘Tomte’. They’re called Nisse’ in Norway.
Around Christmas time in Sweden, one of the biggest celebrations is St. Lucia’s Day (or St. Lucy’s Day) on December 13th. The celebration comes from stories that were told by Monks who first brought Christianity to Sweden. St Lucia was a young Christian girl who was martyred, killed for her faith, in 304AD. The most common story told about St Lucia is that she would secretly bring food to the persecuted Christians in Rome, who lived in hiding in the catacombs under the city. She would wear candles on her head so she had both her hands free to carry things. Lucy means ‘light’ so this is a very appropriate name.
A popular food eaten at St. Lucia’s day are ‘Lussekatts’, St Lucia’s day buns flavored with saffron and dotted with raisins which are eaten for breakfast.
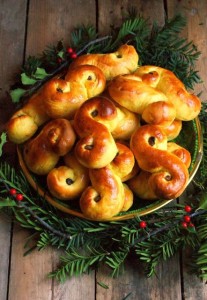
a lussekatter 2

Click here for this delicious Lussekatter recipe

Christmas in Italy
On Christmas Eve, it’s common that no meat (and also sometimes all dairy) is eaten. Often a light seafood meal is eaten people go to the Midnight Mass service. The types of fish and how they are served vary between different regions in Italy.
For many Italian-American families a big Christmas Eve meal of different fish dishes is now a very popular tradition! It’s known as The Feast of the Seven Fishes (‘Esta dei Sette Pesci’ in Italian). The feast seems to have its root in southern Italy and was bought over to the USA by Italian immigrants in the 1800s. It now seems more popular in America than it is in Italy! When people return from Mass, if it’s cold, you might have a slice of Italian Christmas Cake called ‘Panettone’ which is like a dry fruity sponge cake and a cup of hot chocolate!
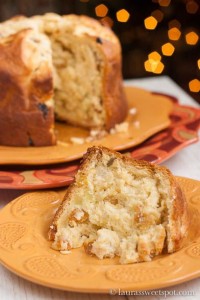
a panettone

Click here to try this Panettone recipe for yourself

Christmas in Greece
In Greek Happy/Merry Christmas is ‘Kala Christougenna’.
On Christmas Eve, children, especially boys, often go out singing ‘kalanda’ (carols) in the streets. They play drums and triangles as they sing. Sometimes they will also carry model boats decorated with nuts which are painted gold. Carrying a boat is a very old custom in the Greek Islands.
If the children sing well, they might be given money, nuts, sweets and dried figs to eat.
The main Christmas meal is often Lamb or pork, roasted in an oven or over an open spit. It’s often served with a spinach and cheese pie and various salads and vegetables. Other Christmas and new year foods include ‘Baklava’ (a sweet pastry made of filo pastry filled with chopped nuts and sweetened with syrup or honey), Kataifi (a pastry made from a special form of shredded filo dough and flavored with nuts and cinnamon), Theeples (a kind of fried pastry). Another popular Christmas dessert are melomakarono, egg or oblong shaped biscuit/cakes made from flour, olive oil, and honey and rolled in chopped walnuts.
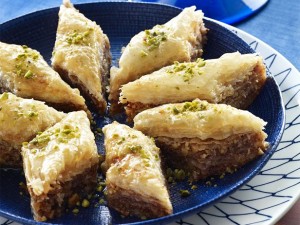
Food Stylist:  Jamie Kimm

Click here to try this mouthwatering Greek Baklava treat

Christmas in Japan
In Japanese Happy/Merry Christmas is ‘Meri Kurisumasu’.
In Japan, Christmas is known as more of a time to spread happiness rather than a religious celebration. Christmas Eve is often celebrated more than Christmas Day. Christmas Eve is thought of as a romantic day, in which couples spend together and exchange presents. In many ways it resembles Valentine’s Day celebrations in the UK and the USA. Young couples like to go for walks to look at the Christmas lights and have a romantic meal in a restaurant – booking a table on Christmas Eve can be very difficult as it’s so popular!
Fried chicken is often eaten on Christmas day. It is the busiest time of year for restaurants such as KFC and people can place orders at their local fast food restaurant in advance!
The traditional Japanese Christmas food is Christmas cake, but it’s not a rich fruit cake, but is usually a sponge cake decorated with strawberries and whipped cream.
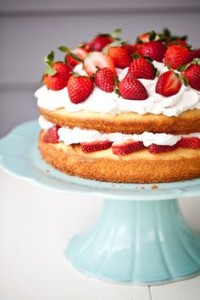
a strawberry sponge 2

Click here for a traditional sponge cake recipe

I hope you enjoyed this “sweet” trip around the world…Let the holiday baking begin!
Dec 082014
 
Strawberry Sponge Cake
[url href=”http://cookingqueen.com/wp-content/uploads/2014/12/a-strawberry-sponge-2-200×300.jpg”][img src=”http://cookingqueen.com/wp-content/uploads/2014/12/a-strawberry-sponge-2-200×300.jpg” width=”200″ height=”300″ class=”alignnone size-medium” title=”a strawberry sponge 2″][/url]
Ingredients
  • 6 oz butter, soft
  • 6 oz white sugar
  • 3 large eggs
  • 6 oz self-rising flour
  • 1 lemon, zested
  • 1 cup whipping cream
  • 1 tsp vanilla bean paste, or vanilla extract
  • 1 tbsp icing sugar and extra for sifting
  • 3/4 lb strawberries
  • 4 tbsp good quality strawberry or raspberry jam
Instructions
  1. Pre-heat the oven to 350°F.
  2. Butter and line two 8 or 9-inch cake tins with parchment paper.
  3. Using a standing mixer, beat the butter, sugar and lemon zest until it becomes pale and fluffy. Add the eggs one at a time, beating well.
  4. Then fold in the flour, one spoonful at a time, and blend until well combined.
  5. Divide the mixture evenly between the 2 cake tins and level off with a knife.
  6. Bake for 20 minutes until the sponge cakes are well risen, golden brown and firm to the touch. Run a rounded butter knife around the inside edge of the cake tin and carefully turn the cake out onto a cooling rack.
  7. Meanwhile, hull the strawberries and slice them in half.
  8. Whip the cream, icing sugar and vanilla until it becomes quite stiff.
  9. When the cakes are cool, spread the jam on one of the sponge cakes and spread half of the whipped cream on top.
  10. Place half of the strawberries on top of the cream.
  11. Place the other sponge cake on top and spread with the remaining whipped cream.
  12. Arrange the remaining strawberries in a spiral round the top of the cake.


Dec 082014
 
Baklava (a Greek dessert pastry)
Cuisine: Greek
[url href=”http://cookingqueen.com/wp-content/uploads/2014/12/a-baklava-300×225.jpg”][img src=”http://cookingqueen.com/wp-content/uploads/2014/12/a-baklava-300×225.jpg” width=”300″ height=”225″ class=”alignnone size-medium” title=”Food Stylist: Jamie Kimm”][/url]
Ingredients
  • For the Baklava:
  • 1 pound pistachios and/or walnuts, coarsely ground, plus more for garnish
  • 1/2 teaspoon ground cinnamon, or to taste
  • 1 cup ground zwieback crackers or breadcrumbs
  • 4 sticks unsalted butter, melted
  • 16 sheets phyllo dough (thawed, if frozen), cut in half
  • For the Syrup:
  • 3 cups sugar
  • 1 6 -to-8-ounce jar honey
  • 1 to 2 tablespoons fresh lemon juice
Instructions
  1. Position a rack in the lower third of the oven; preheat to 350 degrees F.
  2. Combine the nuts, cinnamon and ground crackers in a bowl.
  3. Brush a 9-by-13-inch baking dish with some of the butter.
  4. Layer 10 pieces of phyllo in the dish, brushing each piece with butter before adding the next (keep the remaining dough covered with a damp towel).
  5. Sprinkle a quarter of the nut mixture over the dough.
  6. Layer 4 pieces of phyllo on top, brushing each with butter before adding the next; sprinkle with another quarter of the nut mixture.
  7. Add 4 more phyllo pieces on top, brushing each with butter, then add another quarter of the nut mixture, 4 more pieces of phyllo with butter, and the remaining nuts.
  8. Layer the remaining 10 pieces of phyllo on top of the nuts, brushing each with butter; brush the top piece with extra butter.
  9. Cut into the baklava to make strips, about 1 1/2 inches wide.
  10. Then make diagonal slices, about 1 1/2 inches apart, to create a diamond pattern.
  11. Bake until golden, about 1 hour.
  12. Meanwhile, make the syrup: Bring the sugar, honey and 1 1/2 cups water to a boil in a saucepan over medium heat and cook, 10 to 15 minutes.
  13. Add the lemon juice and boil 2 more minutes, then let cool slightly.
  14. Pour the syrup over the warm baklava; let soak, uncovered, at least 6 hours or overnight. Garnish with nuts.


Panettone (Italian Christmas Bread)

 Breads, Holiday/Entertaining, International  Comments Off on Panettone (Italian Christmas Bread)
Dec 082014
 
Panettone (Italian Christmas Bread)
Cuisine: Italian
[url href=”http://cookingqueen.com/wp-content/uploads/2014/12/a-panettone-200×300.jpg”][img src=”http://cookingqueen.com/wp-content/uploads/2014/12/a-panettone-200×300.jpg” width=”200″ height=”300″ class=”alignnone size-medium” title=”a panettone”][/url]
Ingredients
  • Makes 2 Panettone
  • Ingredients
  • Sponge:
  • 1 satchel (2¼ teaspoons) (7 gm) active dry yeast
  • ⅓ cup (80 ml) warm water
  • ½ cup (70 gm) unbleached all purpose flour
  • First Dough:
  • 1 satchel (2¼ teaspoons) (7 gm) active dry yeast
  • 3 tablespoons (45 ml) warm water
  • 2 large eggs, at room temperature
  • 1¼ cup (175 gm) unbleached all-purpose (plain) flour
  • ¼ cup (55 gm) (2 oz) sugar
  • ½ cup (1 stick) (115 gm) unsalted butter, at room temp
  • Second Dough:
  • 2 large eggs
  • 3 large egg yolks
  • ⅔ cup (150 gm) (5-2/3 oz) sugar
  • 3 tablespoons (45 ml) honey
  • 1 tablespoon (15 ml) vanilla extract
  • 1 teaspoon (5 ml) lemon essence/extract
  • 1 teaspoon (5 ml) orange essence/extract
  • 1 teaspoon (5 ml) (6 gm) salt
  • 1 cup (2 sticks) (225 gm) unsalted butter, at room temp
  • 3 cups (420 gm) (15 oz) unbleached all-purpose (plain) flour; plus up to (2/3 cup) 100 gm for kneading
  • Filling and Final Dough:
  • 1½ cups (250 gm) (9 oz) golden raisins or golden sultanas
  • ½ cup (75 gm) (2-2/3 oz) candied citron
  • ½ cup (75 gm) (2-2/3 oz) candied orange peel
  • Grated zest of 1 orange
  • Grated zest of 1 lemon
  • 2 to 3 tablespoons (30-45 ml) (15-25 gm) unbleached all-purpose (plain) flour
Instructions
  1. For the Sponge: Mix the yeast and water in a small bowl and allow to stand until creamy; about 10 minutes or so.
  2. Mix in the flour. Cover with plastic wrap and allow to double in size for about 20 to 30 minutes.
  3. For the First Dough: In the bowl of a stand mixer, mix together the yeast and water and allow to stand until creamy, about 10 minutes or so.
  4. With the paddle attachment, mix in the sponge, eggs, flour, and sugar.
  5. Add in the butter and mix for 3 minutes until the dough is smooth and even.
  6. Cover with plastic wrap and allow double in size, about 1 – 1 ¼ hours.
  7. For the Second Dough: To the first dough, with the paddle attachment, mix in the eggs, egg yolks, sugar, honey, vanilla, essences/extracts, and salt until well combined.
  8. Mix in the butter until smooth.
  9. Add the flour and slowly incorporate.
  10. At this stage the dough will seem a little too soft, like cookie dough.
  11. Replace the paddle with the dough hook and knead for about 2 minutes.
  12. Turn out the dough and knead it on a well-floured surface until it sort of holds its shape.
  13. Don’t knead in too much flour but you may need as much as ⅔ cup (100 gm).
  14. Be careful the excess flour will affect the finished product
  15. For the First Rise: Oil a large bowl lightly, plop in your dough and cover with plastic wrap.
  16. Now we need to let it rise until it has tripled in size.
  17. There a few ways to go about this: Rise in a warm place for 2 – 4 hours OR find a cool spot (64°F -68°F) (18°C – 20°C) and rise overnight OR rise for 2 hours on your kitchen bench then slow the rise down and place in the refrigerator overnight.
  18. If you do this it will take some time to wake up the next morning (maybe another hour or two).
  19. For the Filling and Final Rise: Soak the raisin/sultanas in water 30 minutes before the end of the first rise.
  20. Drain and pat dry with paper towels.
  21. Now take your dough and cut it in half.
  22. Combine all your filling ingredients in a bowl and mix well.
  23. Press out one portion of dough into an oval shape.
  24. Sprinkle over one quarter of the filling and roll up the dough into a log.
  25. Press out again into an oval shape and sprinkle over another quarter of the filling.
  26. Roll into a log shape again.
  27. Repeat with the second portion of dough.
  28. Shape each into a ball and slip into your prepared pans, panettone papers or homemade panettone papers.
  29. Cut an X into the top of each panettone and allow to double in size.
  30. Rising time will vary according to method of first rise.
  31. If it has been in the refrigerator it could take 4 hours or more.
  32. If it has been rising on the kitchen bench in a warm place it should be doubled in about 2 hours.
  33. For Baking: When you think your dough has only about 30 minutes left to rise, preheat your oven to moderately hot 400°F/200°C/gas mark 6.
  34. Just before baking carefully (don’t deflate it!) cut the X into the dough again and place in a knob (about a tablespoon) of butter.
  35. Place your panettoni in the oven and bake for 10 minutes.
  36. Reduce the heat to moderate 350°F/180°C/gas mark 4 and bake for another 10 minutes.
  37. Reduce the heat again to moderate 325°F/160°C/gas mark 3 and bake for 30 minutes until the tops are well browned and a skewer inserted into the panettone comes out clean.
  38. Cooling your panettone is also important.
  39. If you have use papers (commercial or homemade) lie your panettoni on their side cushioned with rolled up towels.
  40. Turn gently as they cool. If you have used pans cool in the pans for 30 minutes then remove and cushion with towels.